Atari Lynx Vault is free, ad-free, and community-supported — please consider donating.
This site takes real effort to maintain. Your donation helps keep the lights on and the Lynx legacy alive.
via PayPal · any amount helps

This page covers some of the common issues with the Atari Lynx model 2 buttons and D-pad, focusing on the ribbon membrane that is found inside the Lynx shell. If you need to know how to take your Lynx apart, please check this article first - Lynx 2 disassembly steps and Screw size chart.
Your Lynx model 2 buttons and D-Pad can stop working for several reasons, but most of the issues can be traced back to the membrane that carries the signals. We have a scan and pinout for this membrane for reference.
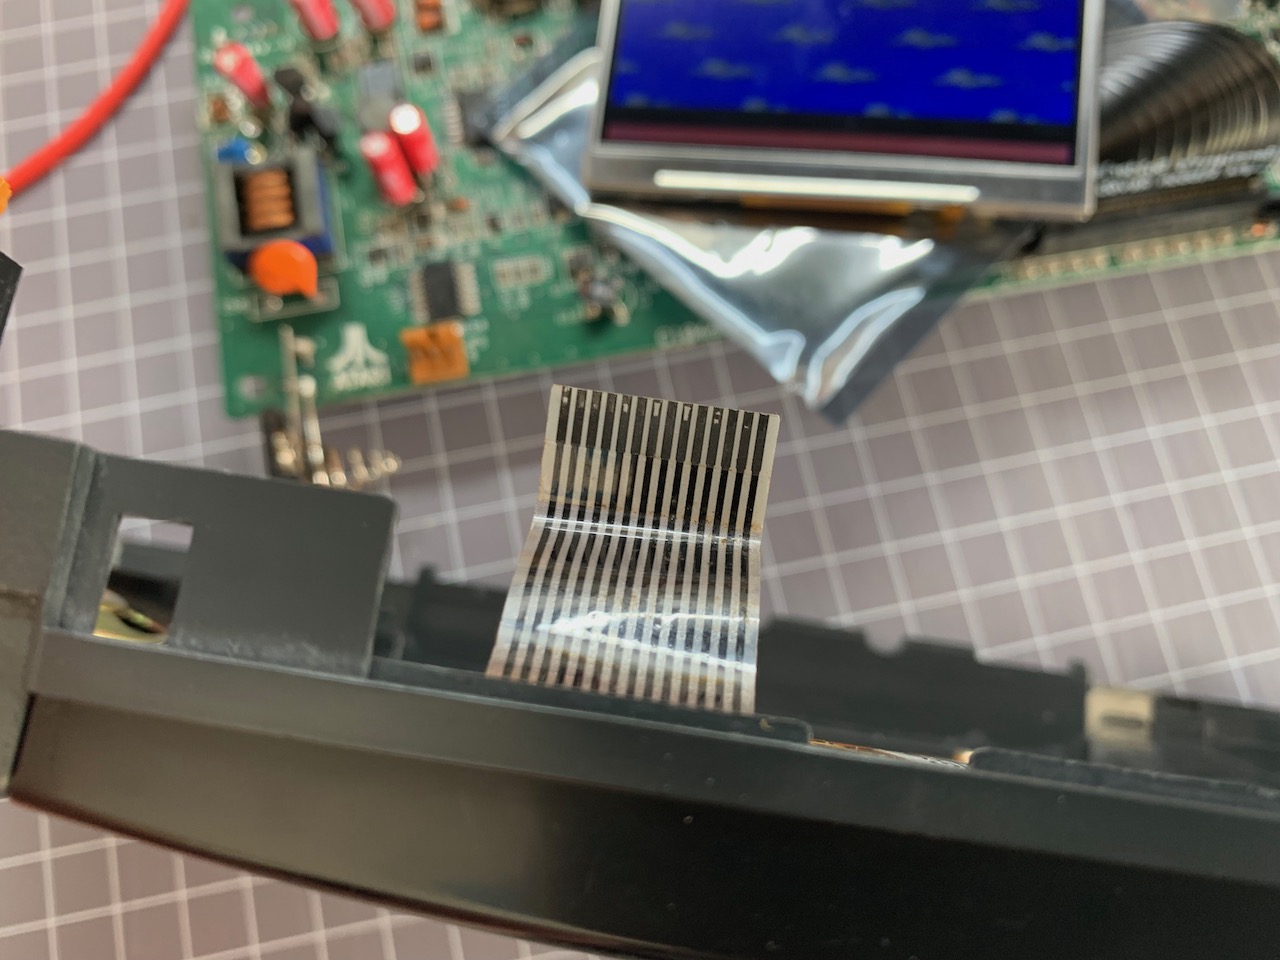
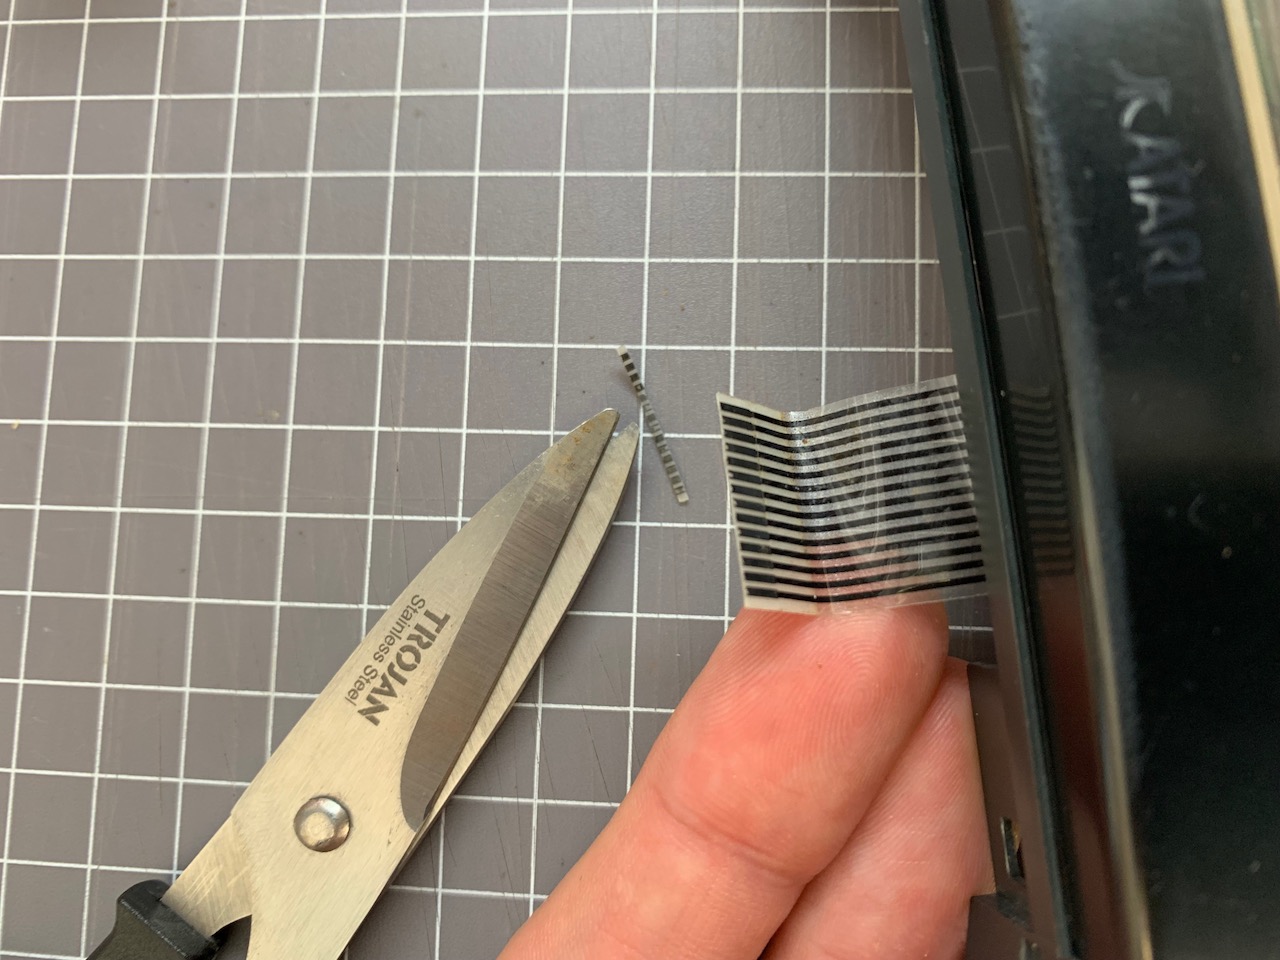
If some of the keys are not responding, check the connector end of the membrane ribbon cable. If it looks like the one below (click image for a larger picture), with what seem like gaps or holes on the ends of the fingers, it means the contact surface has degraded or rubbed off. The ribbon cable can be trimmed by up to around 3mm if necessary. Try to trim it only as much as needed to get a more full contact surface on each finger, then reconnect the membrane into your Lynx. You will have to push the ribbon into its socket as far as it will go.
Alternatively you can buy a full replacement Lynx 2 button membrane from K-Retro.
 |  |
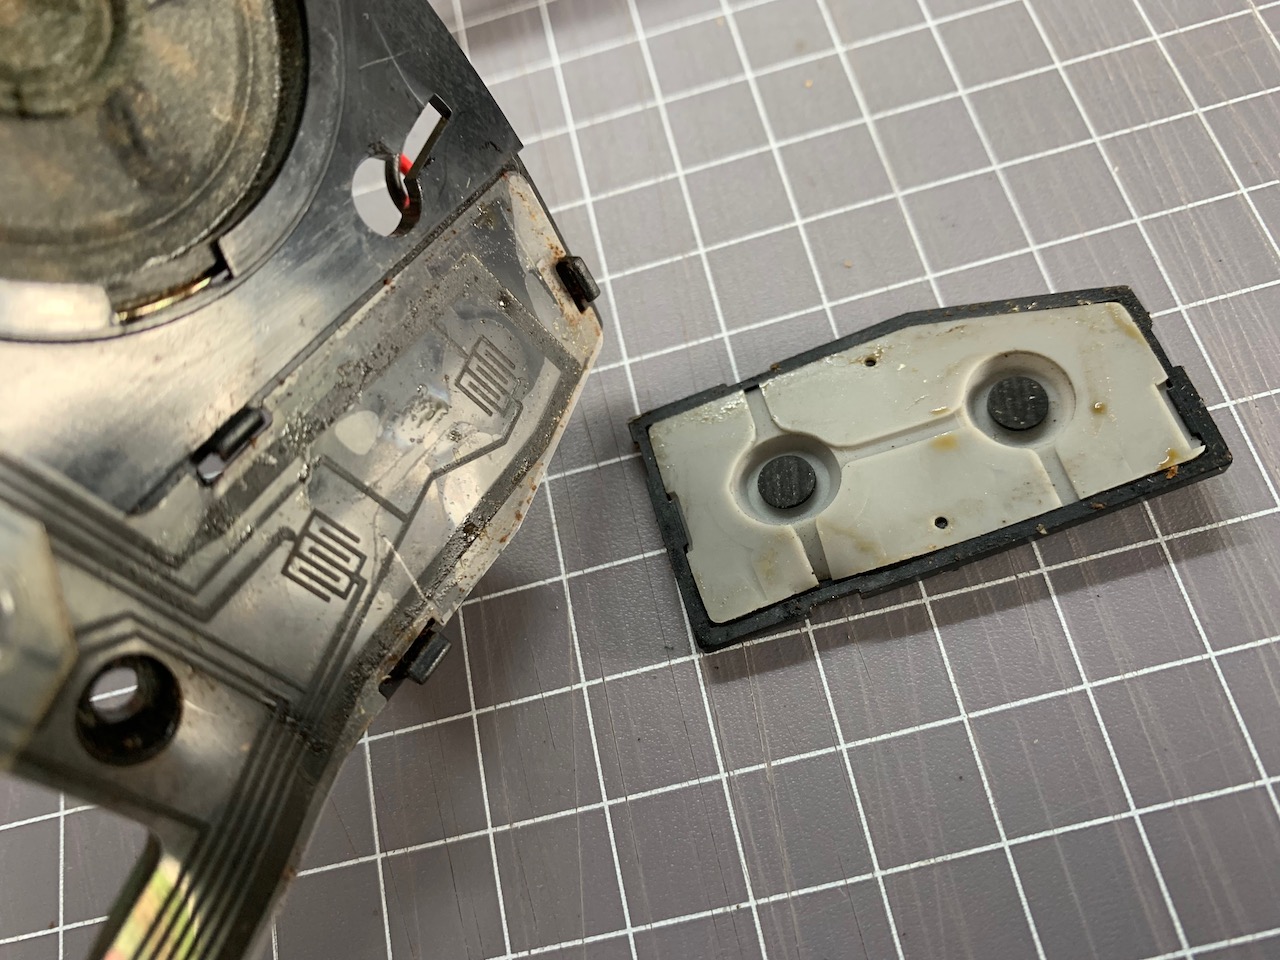
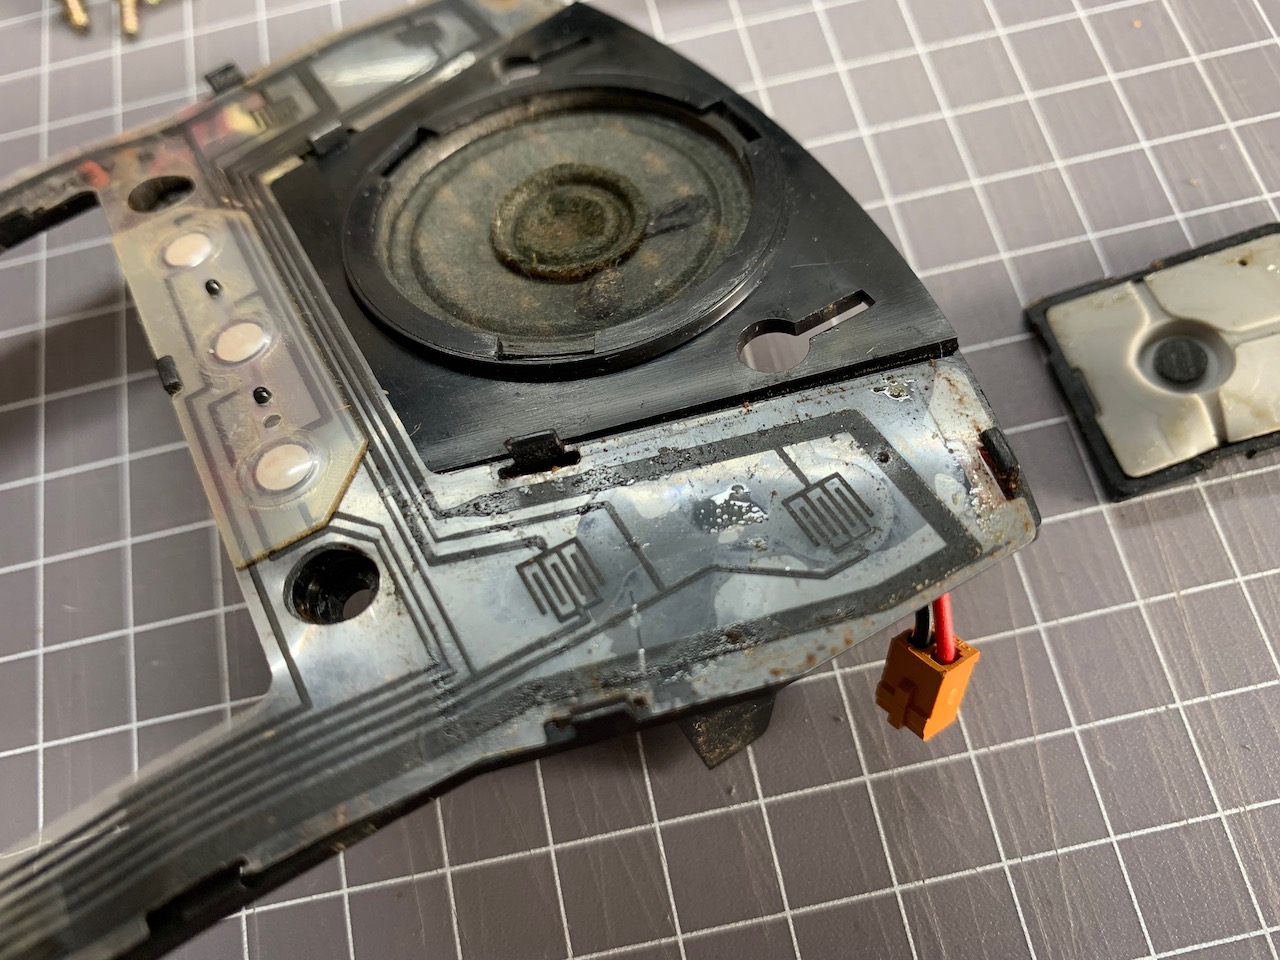
If your Lynx is behaving in odd ways that indicates that some of the buttons are triggering without being pressed, you need to take the membrane out of the Lynx shell and remove the rubber pads that are on each button. It's possible that there is dirt or sticky grime (old soft drink) inside the pads that's causing membrane contacts to short and trigger buttons. Simply clean these with some IPA and let it dry before re-assembly. Be careful not to rub the contacts off completely as they are made out of conductive carbon.
 |  |
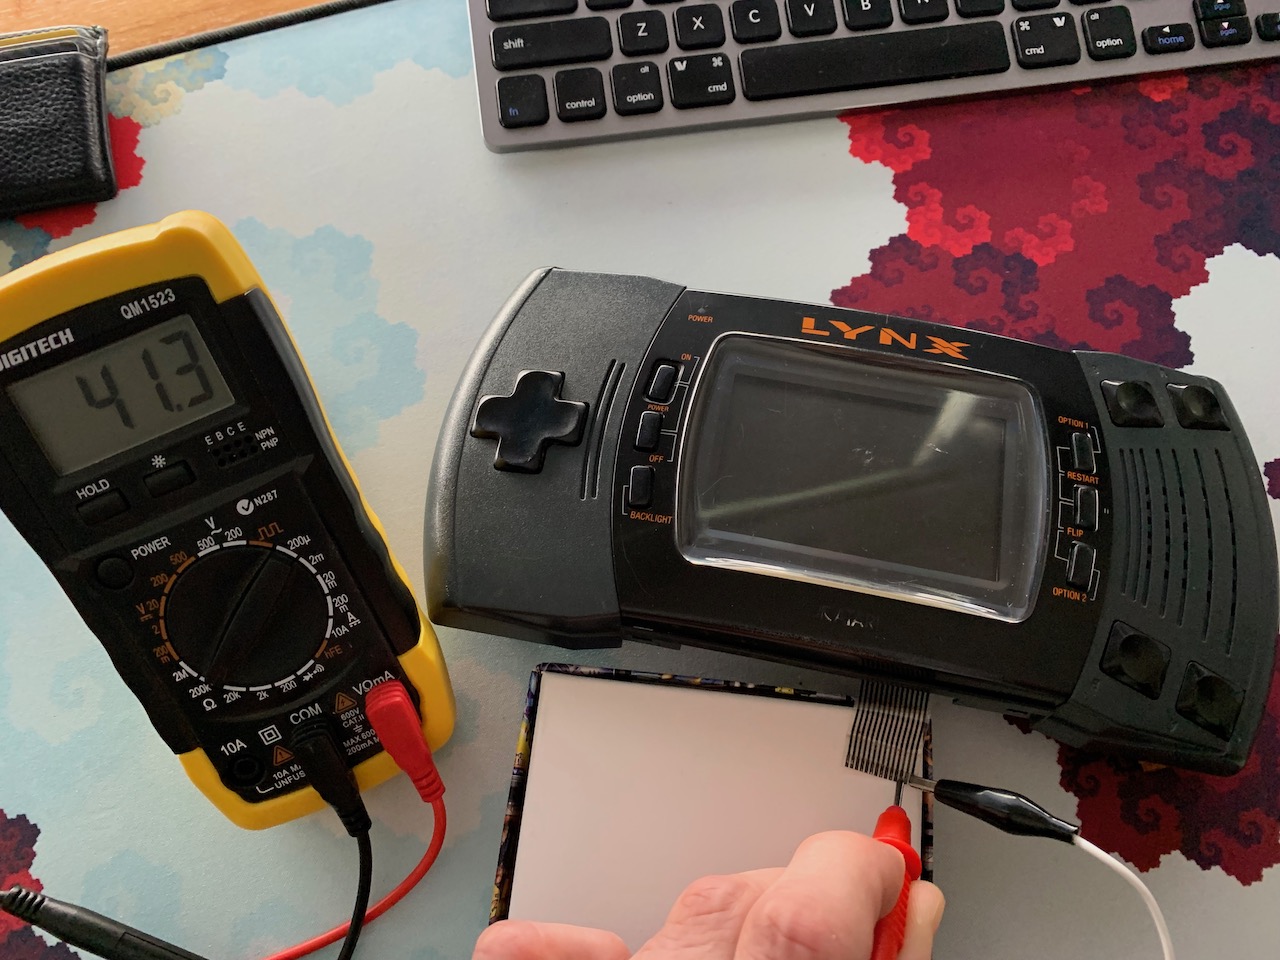
If there is no sticky grime inside the pads or on the ribbon, it's time to measure the resistance of the membrane. Using the pinout check each of the buttons in turn. Most of the buttons are tested by checking resistance between the rightmost finger (black) and a finger to the left of it i.e. black and yellow for the Upbutton. The On button is tested by checking the dark green and rose coloured traces. Do this with your multimeter set to 200K.
There should be no reading (infinite) for all of the buttons. If any of the buttons give you a reading (like in the photo below), you need to trace its contacts on the membrane and clean them, there's likely fine carbon powder shorting them out. This can happen along the entire length of the trace, not just where the button pads are. If cleaning these does not help, you will need to replace your key membrane, these are available from K-Retro.
You should also test the resistance of the membrane when buttons are pressed. The ideal/perfect value should be 200Ω but values as high as 20kΩ should also work, though higher values indicate a membrane that is wearing out.
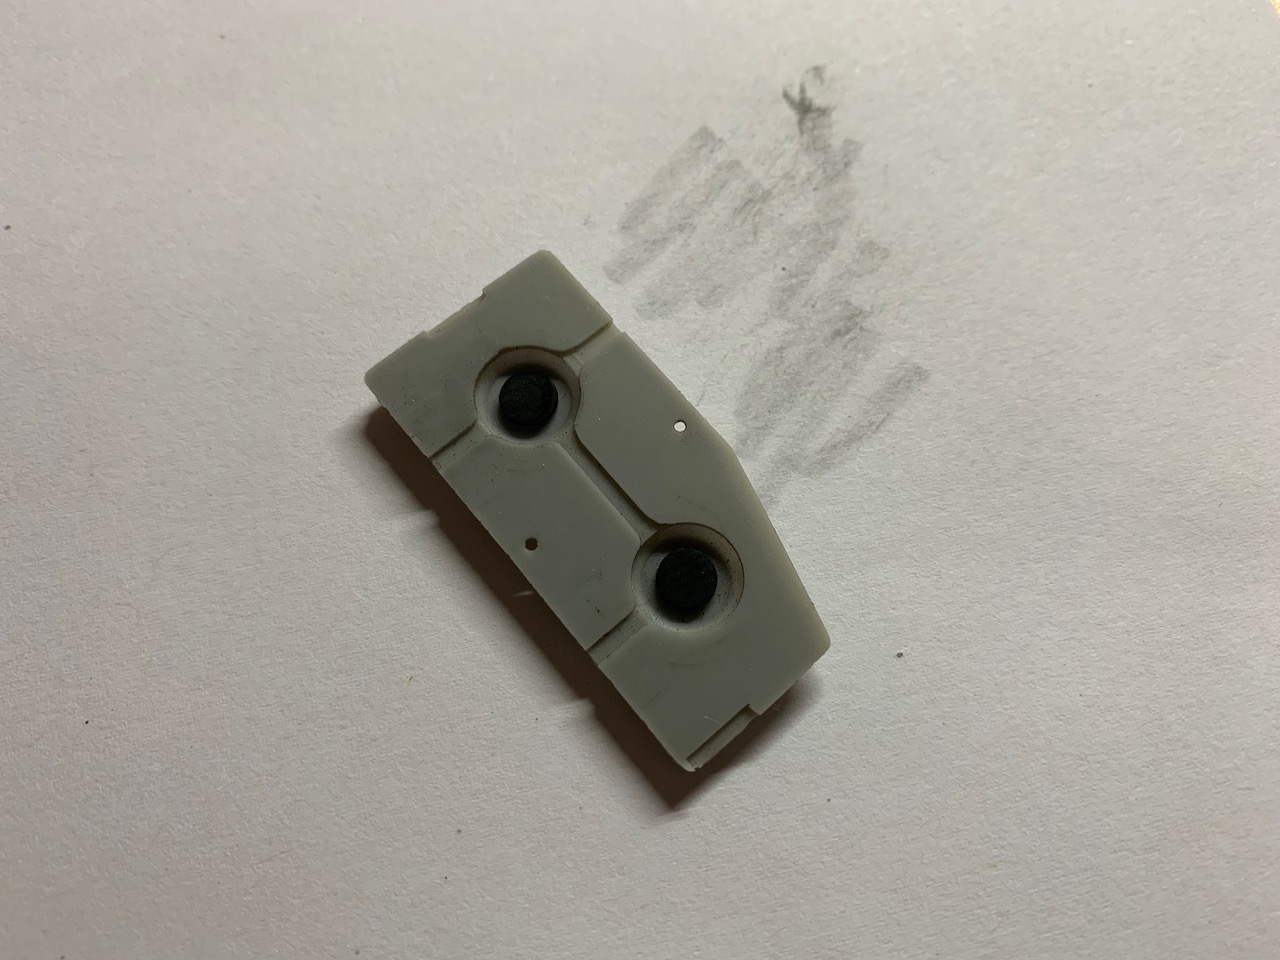
^If you tested the membrane for resistance and everything checks out ok, but the buttons do not respond, you can try to rejuvenate the rubber pad contacts. The part of the rubber pad I'm talking about is the round black section that shorts the membrane when a button is pressed. The black rubber is impregnated with carbon to make it conductive and can get hard with time. Get a clean piece of white paper and gently rub the black part of the pad on it, once you see a black trail, stop. This strips off some layers of hardened rubber and may help with making a good contact again.
If you prefer to get new replacement pads, K-Retro has them.
This page is part of the Atari Lynx Repair and Troubleshooting Guides series.
^
♥ Did we get something wrong or you have something to contribute? Please tell us about it!
♣ We're looking for content editors and maintainers, if you want to help us out, let us know!