This is a guide on how to disassemble an Atari Lynx model 1 console. At the end of the guide we include a screw size chart in case you are missing any screws and need replacements.
Table of Contents
Lynx Model 1 Disassembly
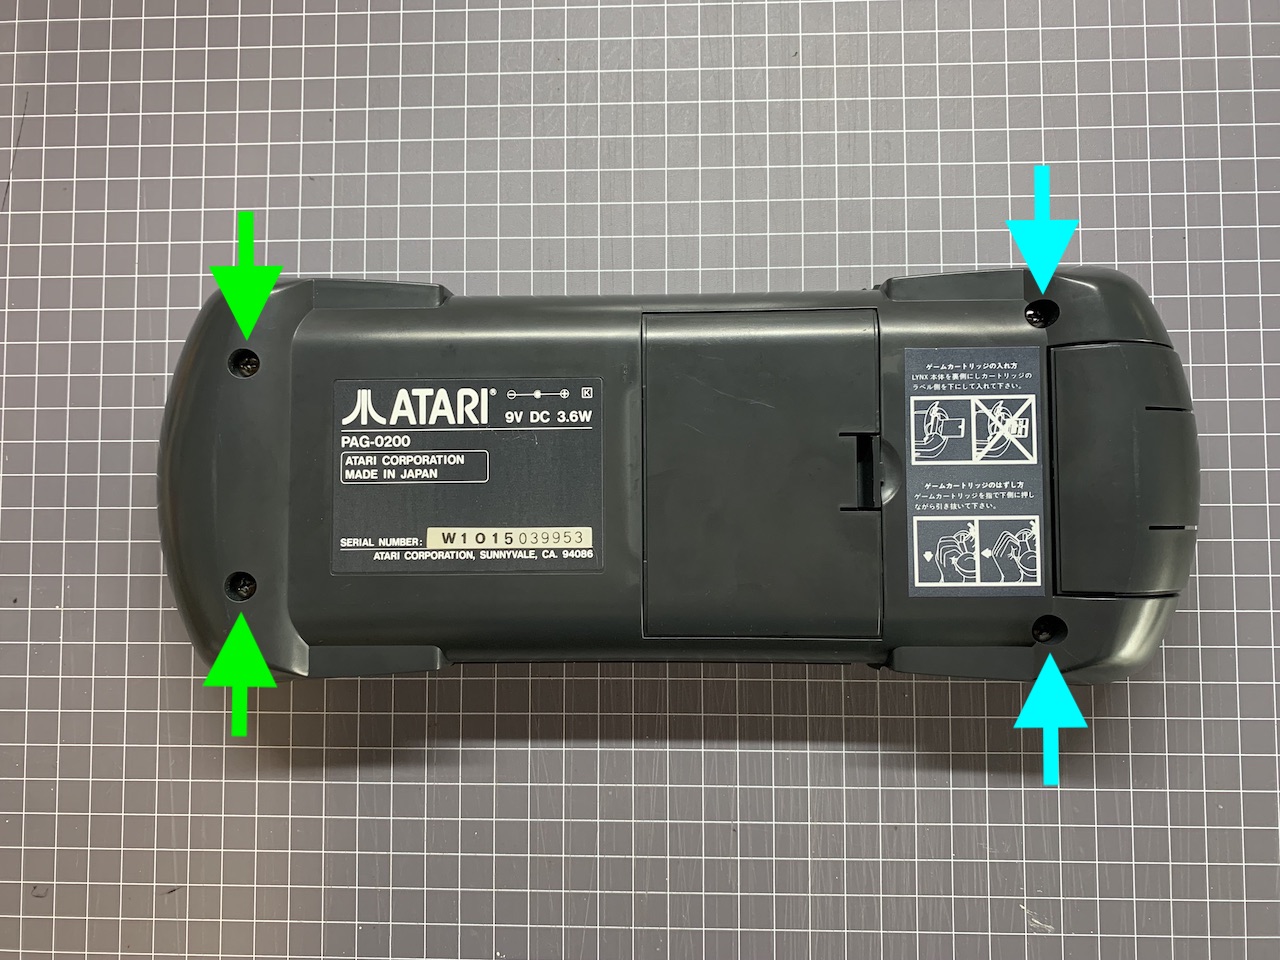
Step 1 - Using a Phillips type screwdriver, unscrew the four screws on the back of the Lynx. There is a pair of longer screws (left side) and a pair of shorter screws (right side).
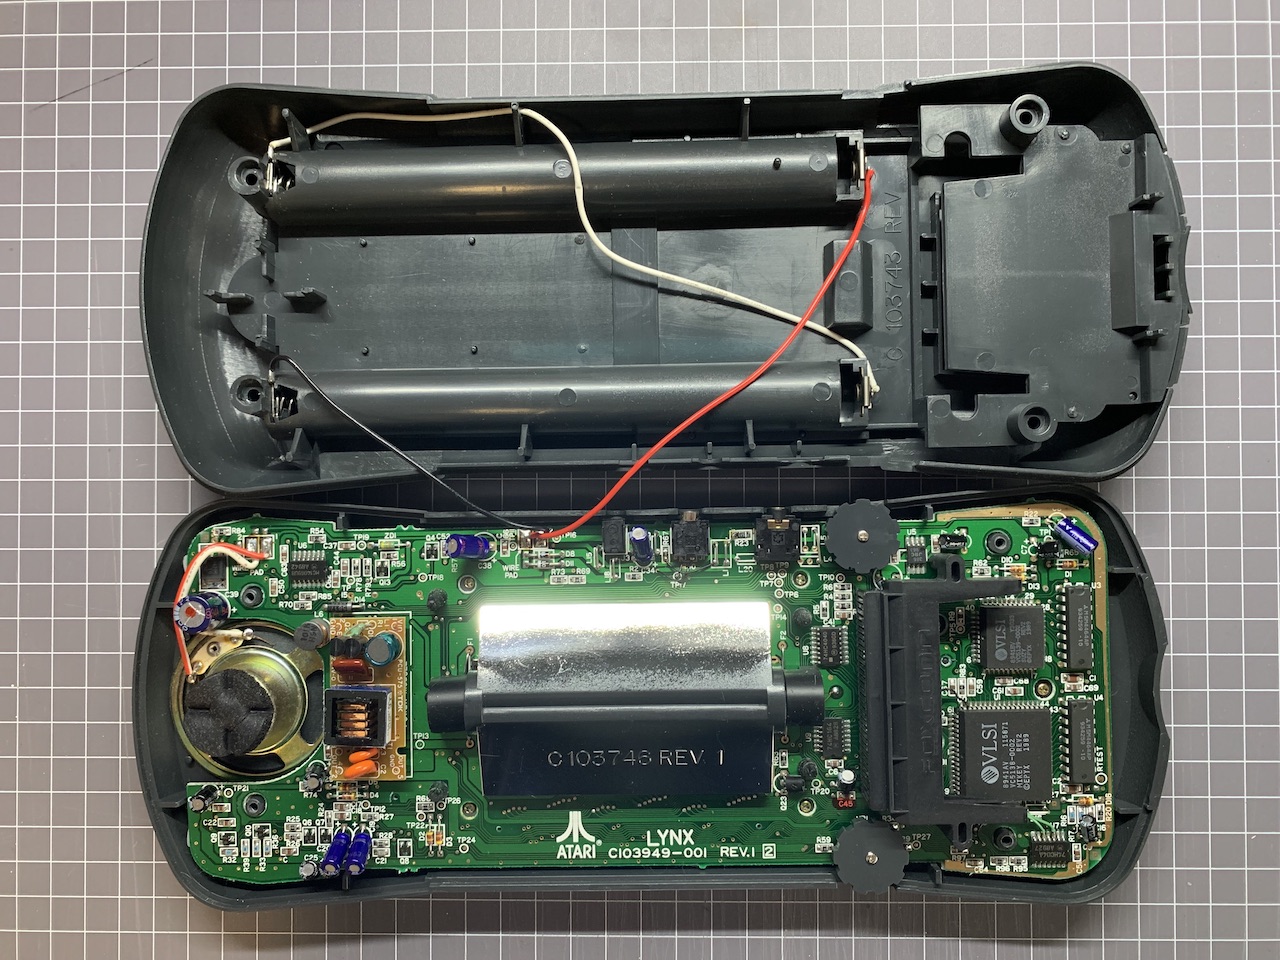
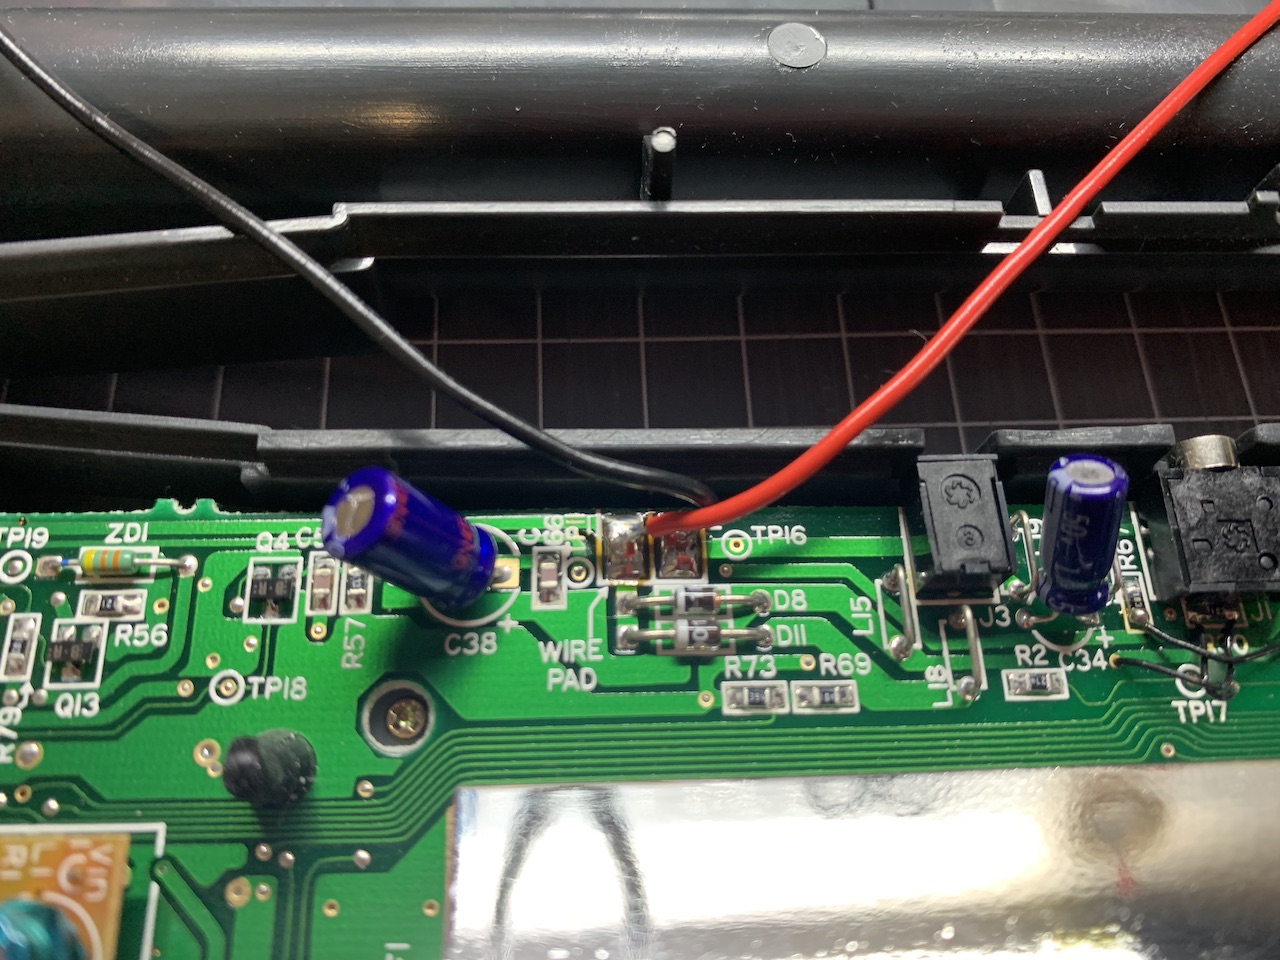
Step 2 - Carefully lift the back part of the Lynx like a clamshell, lifting the part closest to you first. There will be two wires for the battery contacts soldered to the motherboard. Desolder these.
 |  |
Step 3 - The Lynx motherboard can be lifted out of the front case section now. Careful to remove the button pads, they tend to stick to the motherboard. The speaker does not need to be desoldered as it will not get in the way and can be lifted out with the motherboard.
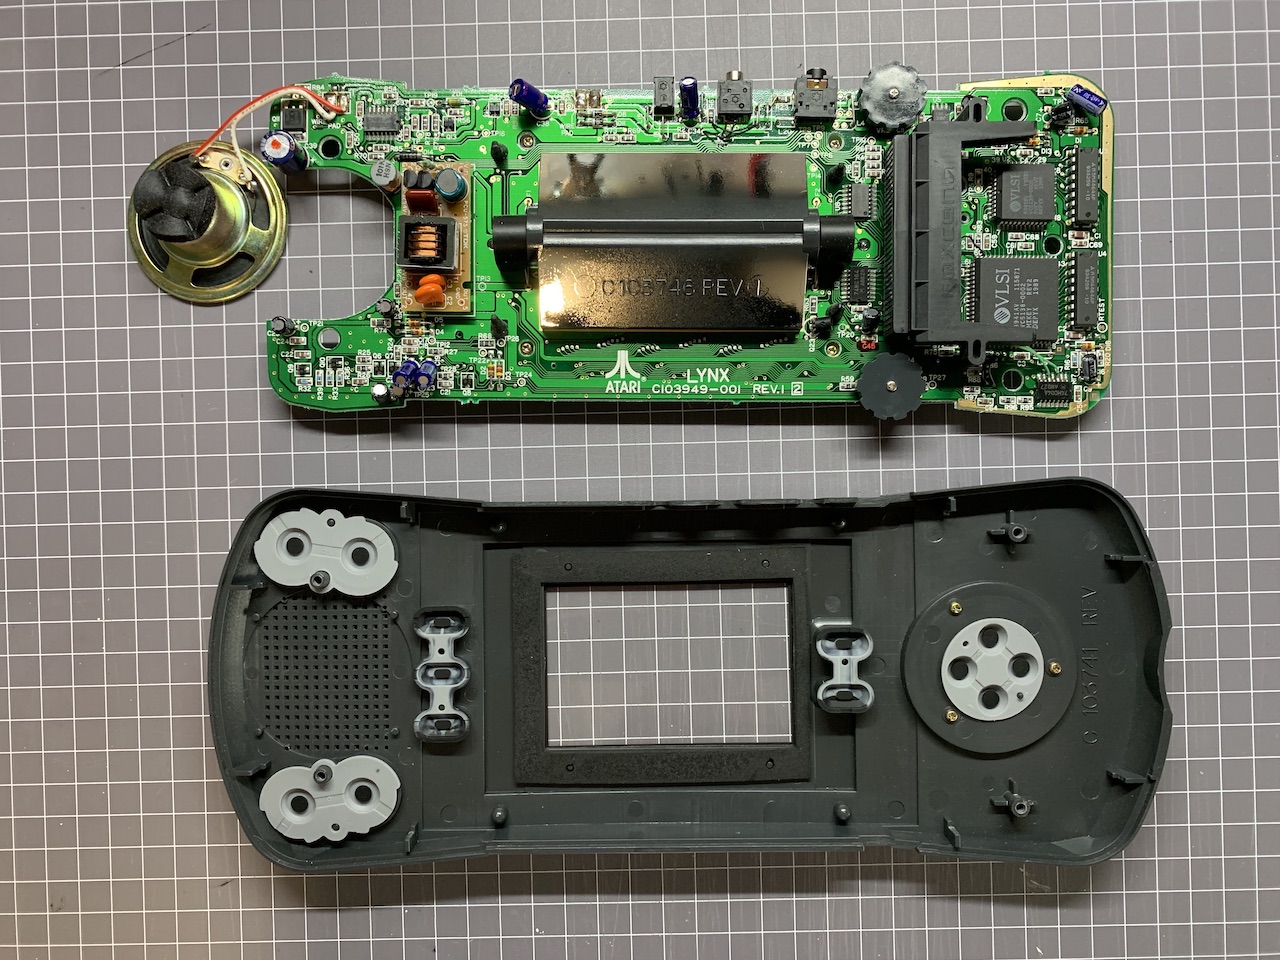
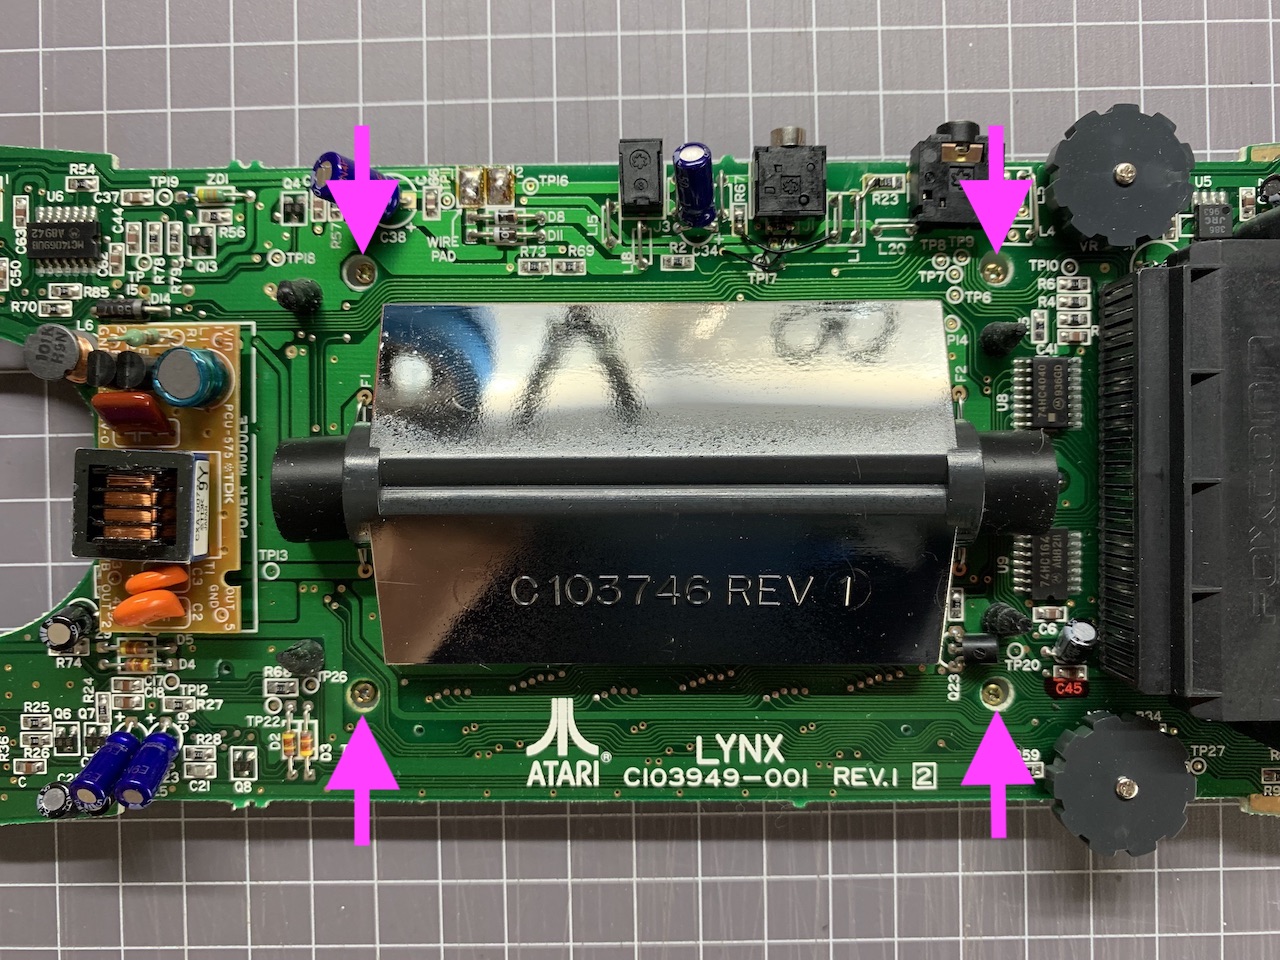
Step 4 - The screws that are holding the screen assembly in place can be removed next using a Phillips style screwdriver..
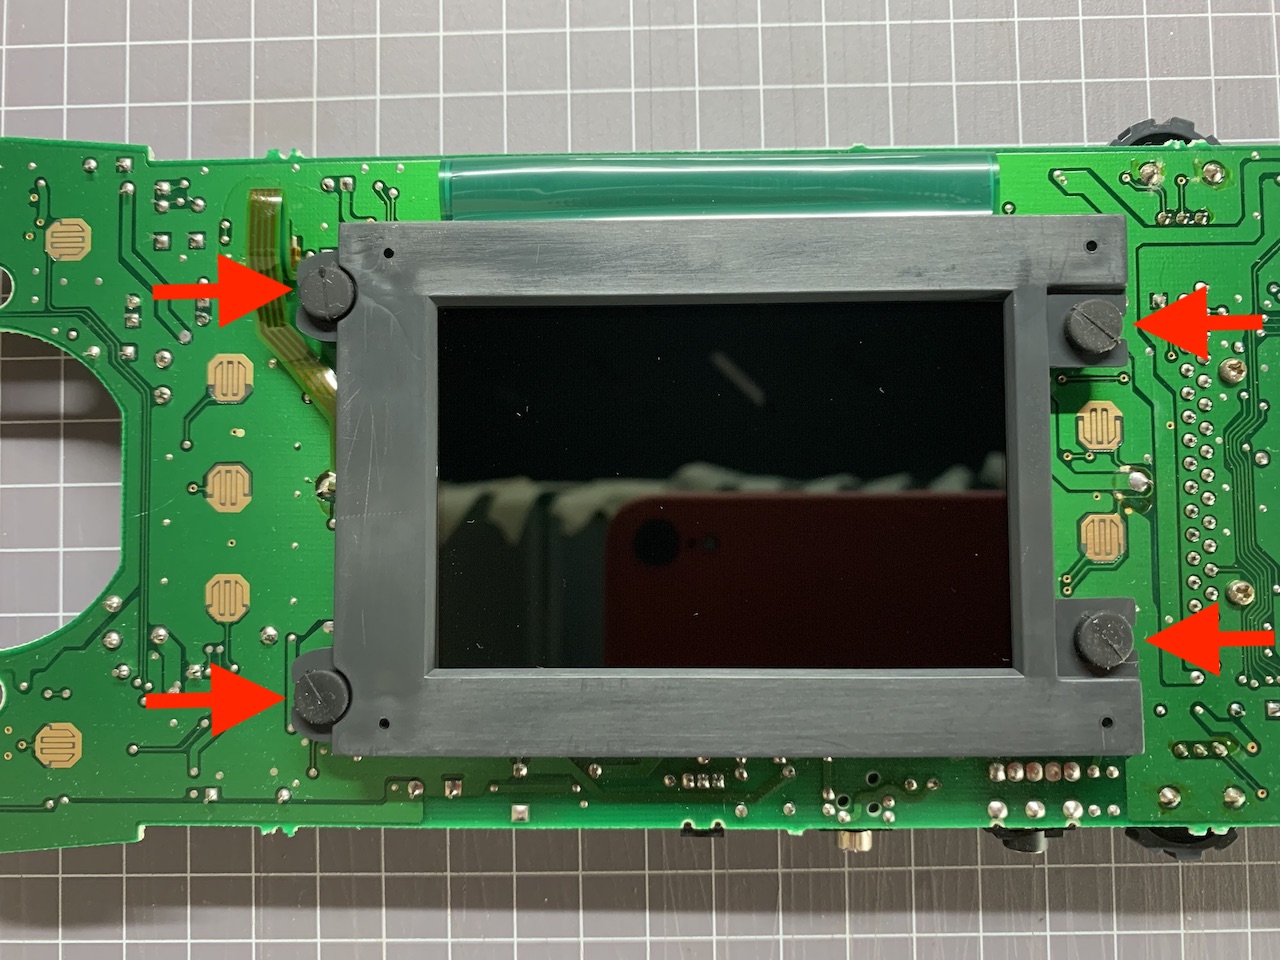
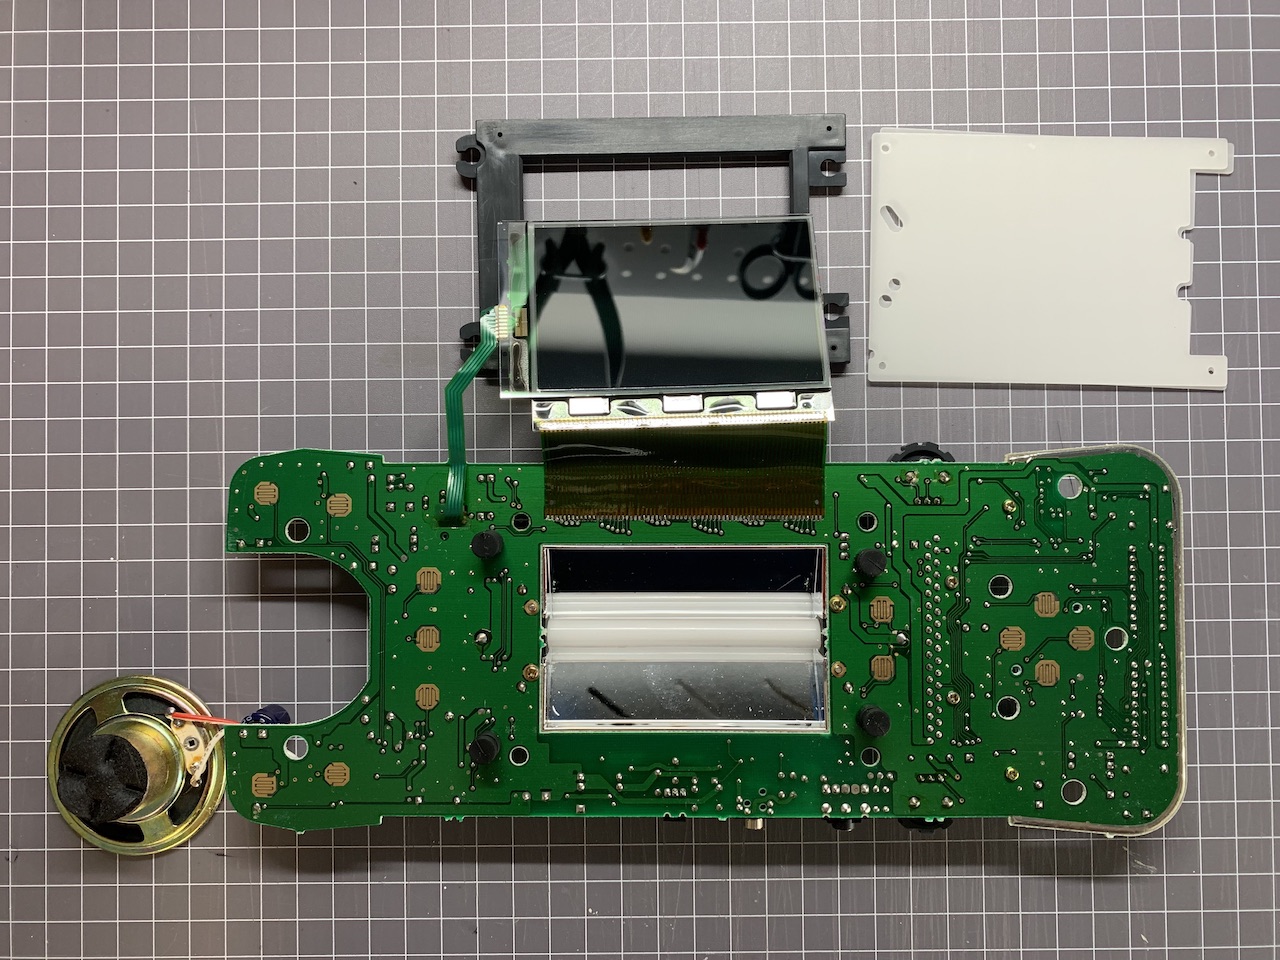
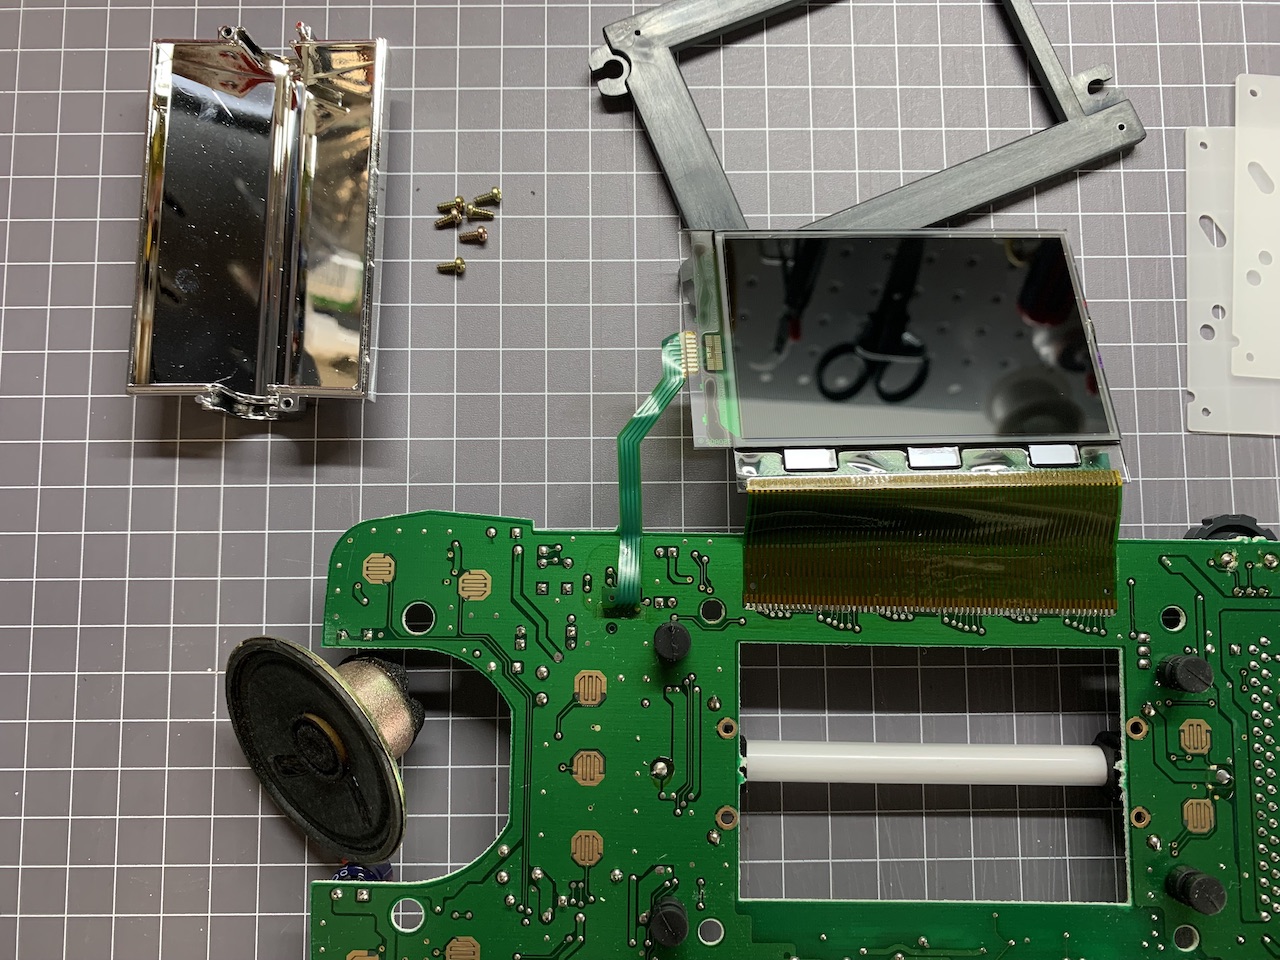
Step 5 - Flip the motherboard over and pull the rubber supports that hold the screen in place to the sides. The screen can be lifted up now, the backlight diffuser will come out at the same time.
 |  |
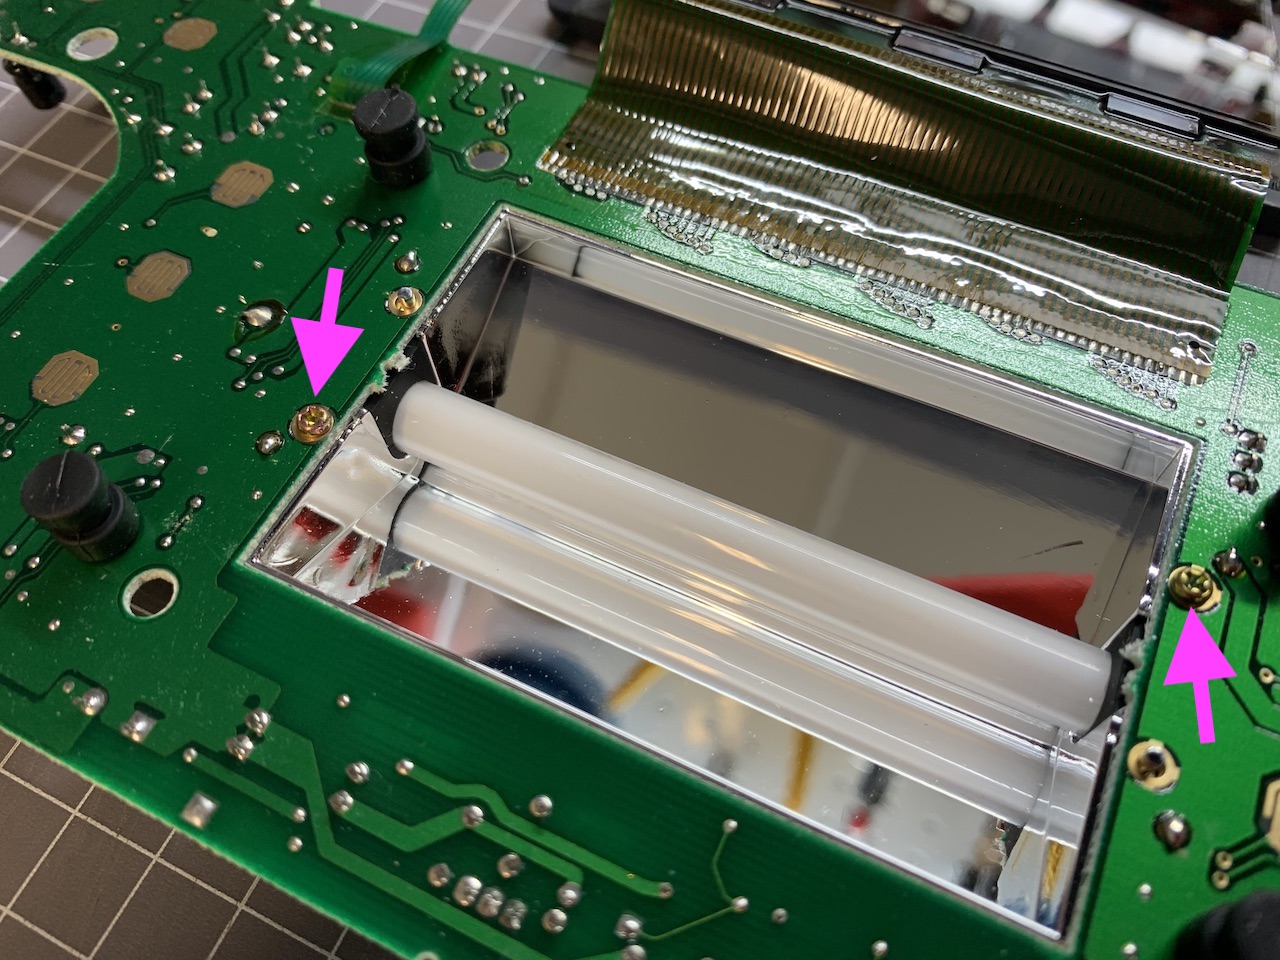
Step 6 - Remove the two screws that hold the CF tube reflector in place using a Phillips type screwdriver.
 |  |
Screw Size Chart
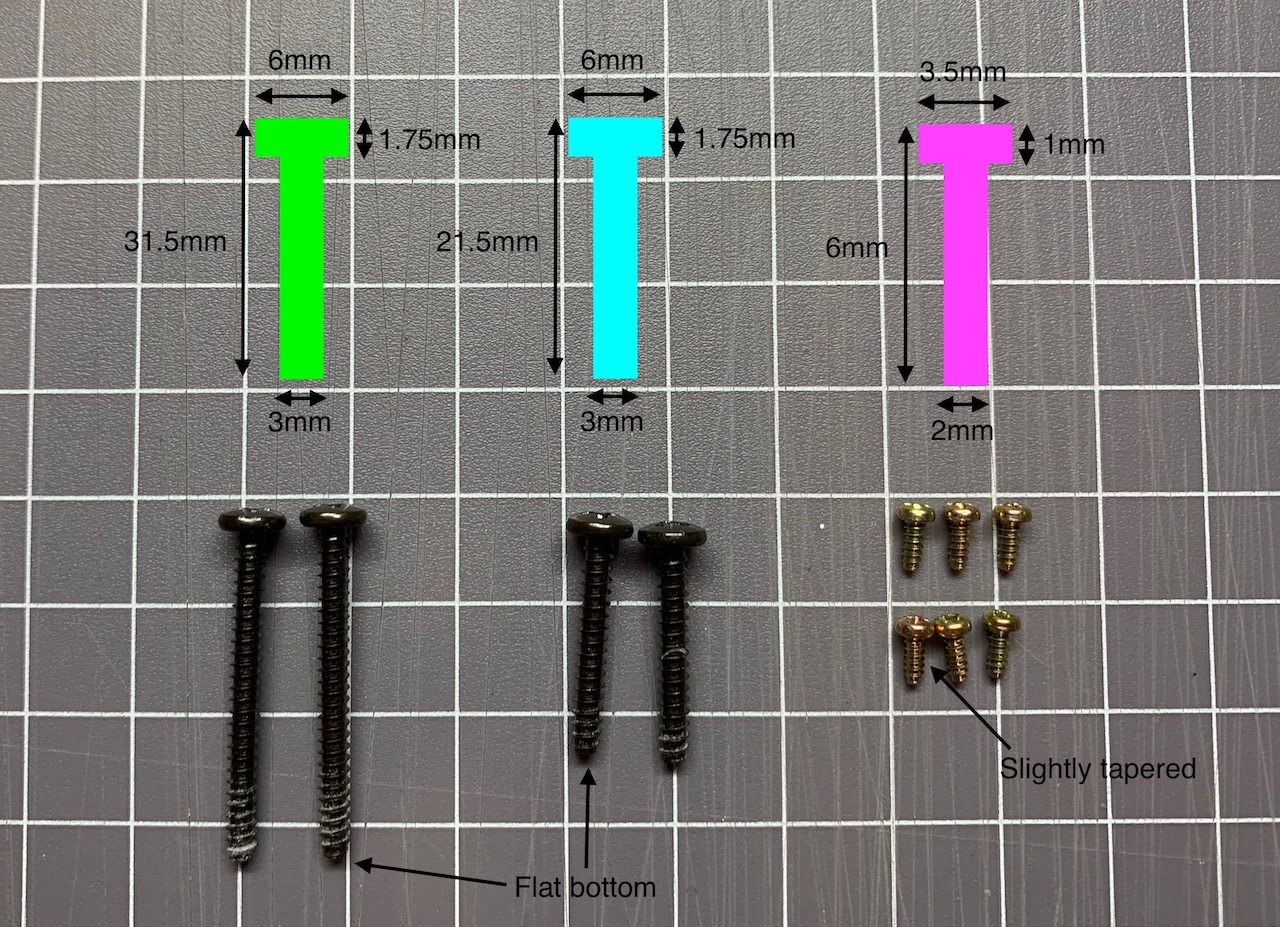
There are a total of 10 screws inside an Atari Lynx (model 1) -
- 2x external case screws (green)
- 2x external case screws (cyan)
- 6x internal screen screws (magenta)
Each of the black coloured external screws are 3mm in diameter but vary in length from 21.5mm to 31.5mm. Thread pitch appears to be similar on these two pairs. The internal screws are brass coloured and have a slightly tapered body, they're all 6mm long. All screws are Phillips type.
This page is part of the Atari Lynx Repair and Troubleshooting Guides series.
^
